
HAPPY THANKSGIVING EVERYONE!
You might be surprised to know I have time to Blog on Thanksgiving and we are hosting! It was a busy week, but I've been prepping all week, and don't have much left to do! So I'm feeling pretty good about myself (pat on the back :)). Anyway, I wanted to share with you my wonderful window boxes! My husband and I were blessed or cursed with HUGE window boxes when we bought our home. The are great and add a lot to our little home, they are just so expensive to fill! This summer we left them empty, because they would have easily cost us around $400 or more to fill. Well, it's Christmas season, we are hosting Thanksgiving, and I did not want my window boxes to look drab anymore. So, I called the one person I know who always has AMAZING window boxes, my mother-in-law. Let me just start by saying what a sweet, kind, and giving person she is. I am so incredibly blessed to have married into such a wonderful family. She, along with the rest of the in-laws are absolutely wonderful. I called her for help. She told me what she put in her window boxes, told me where to get the stuff to fill them, and so I took the plunge and splurged on the greenery! Boy was it worth it! I have never done window boxes, but it was so easy and actually kind of fun! Now our home feels ready for Christmas. The investment for these window boxes, keep in mind, ours are twice the size of most cost us MUCH less than what it would cost to fill with flowers in the spring. Here is what you will need and how to make beautiful Winter Window Boxes!
This is your end result!

Start With Your Window Box, I believe most people empty the dirt out, we did not.

These are the Greens you want to pick up. Most of them I got at The Home Depot! :) They have decent prices and a lot to choose from.

I got 4 bunches of spruce tips, and spaced them out in the back of the window boxes.

Then I placed 4 bunches of the mixed greens that were only $5 a bunch from Home Depot in between the Spruce Tips

Next, I took the "fluffy" spruce tips (with the longer needles) and mixed them in the front, hanging over the edge a bit.

Then I added the the magnolia leaves and those things with the little yellow buds on the end.
Then I added some Red branches, dried hydrangea's...

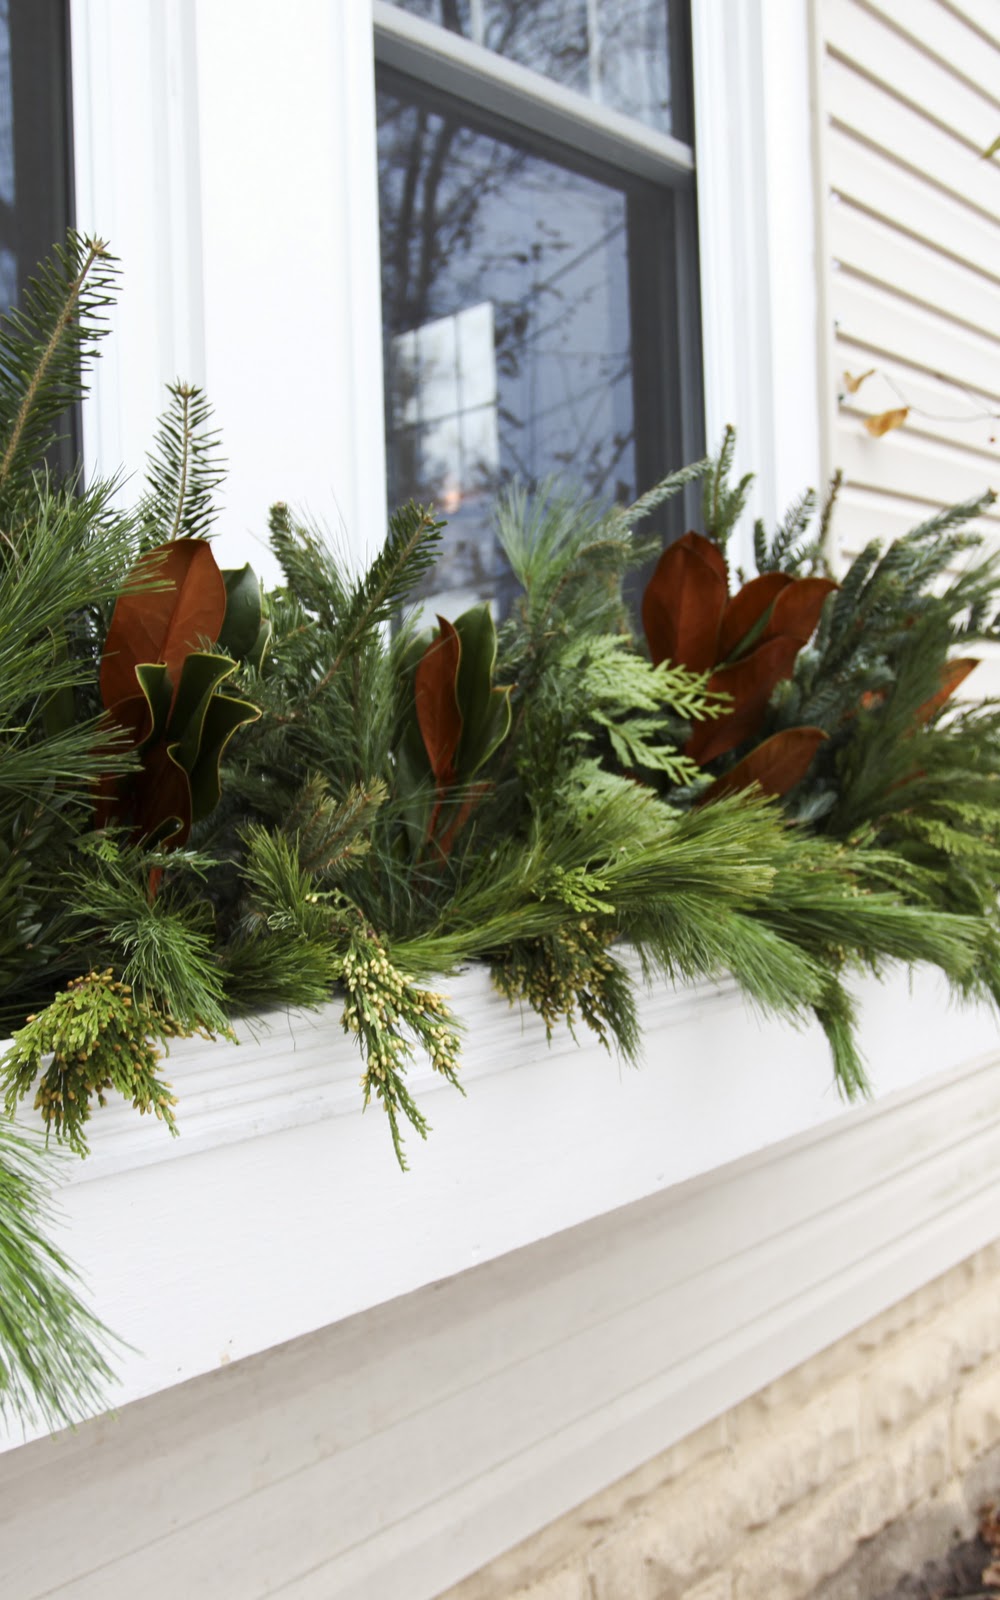
Here is a closer look!

And TA DA! You've got a beautiful window box! All you need now is snow! Maybe a little sparkle and some twinkling lights!

I will work on getting the correct name of all the plants and keep you all updated if I add anything spectacular! A huge THANK YOU to my mother in law for the inspiration! Now I have a little more confidence that I can make a pretty window box in the Spring!
No comments:
Post a Comment